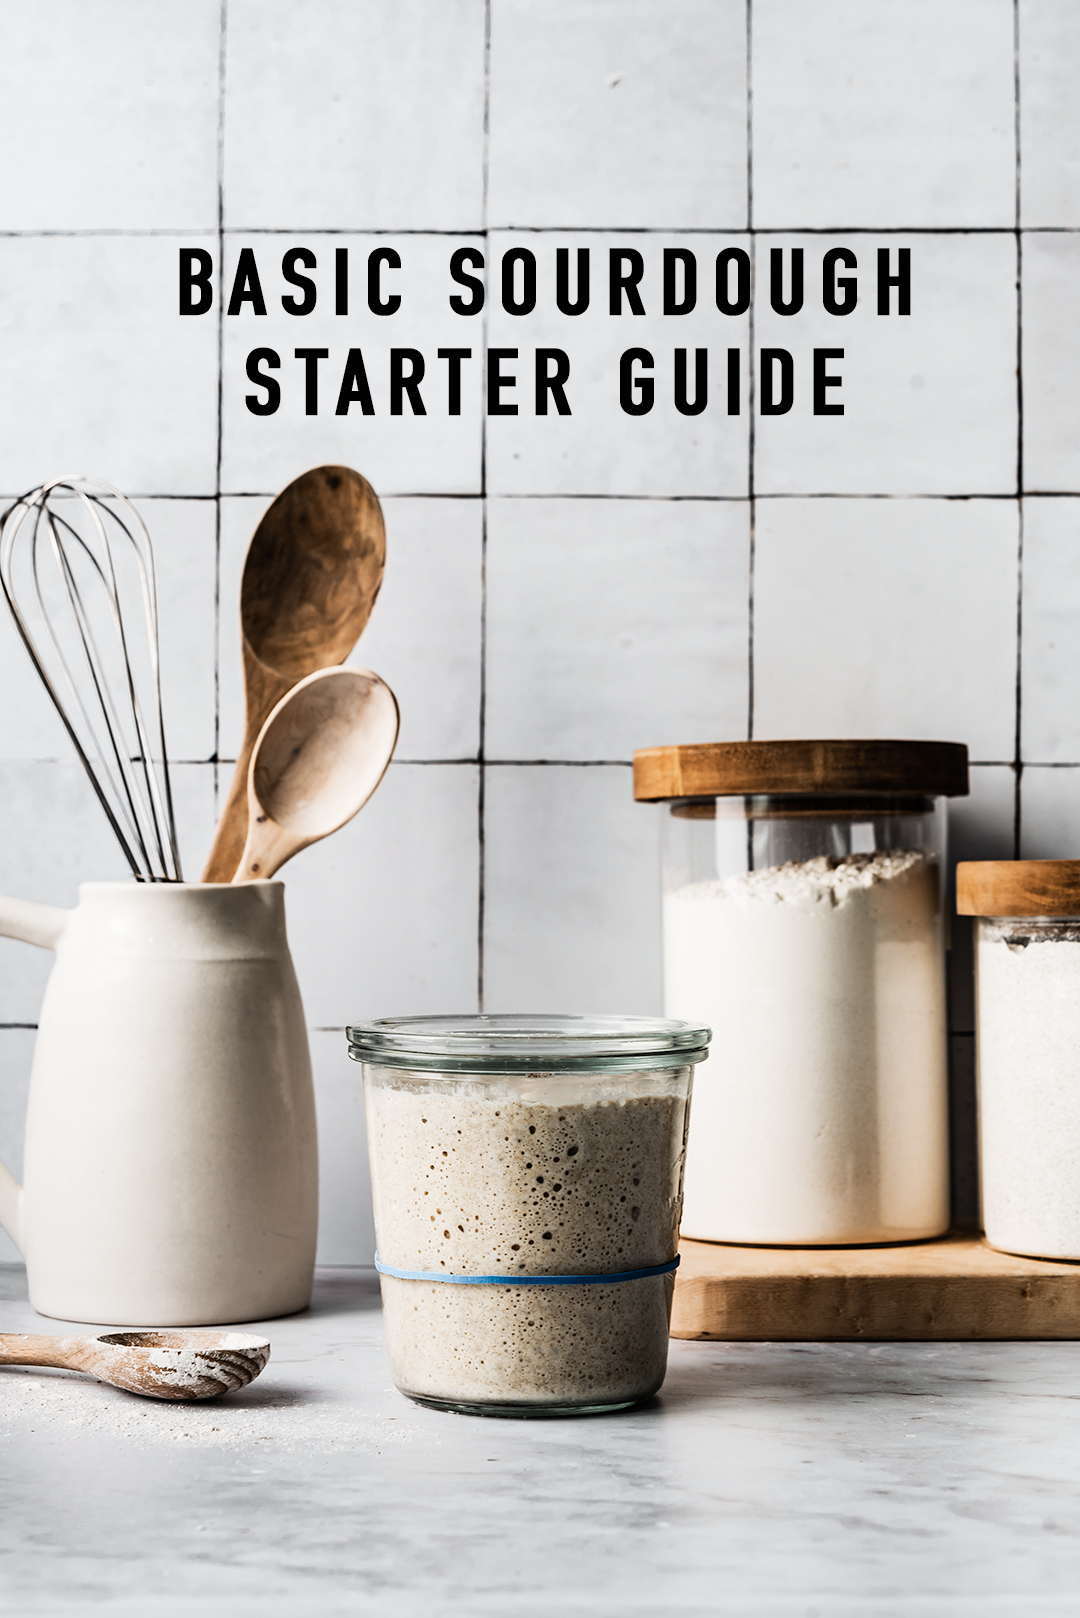
Building a sourdough starter is one of the most satisfying culinary adventures that you can embark on. Harvesting the power of wild yeast to create rustic, light and delicious sourdough baked goods is a deeply rewarding experience. Building a sourdough starter from scratch does not have to be an intimidating process. Rather, in this basic sourdough starter guide, I will show you that all you need is 5 minutes a day for 7 days and you can create a robust, lively sourdough starter!
WHERE DOES WILD YEAST COME FROM?
Contrary to popular belief that the yeast in sourdough comes from the air, the primary initial source of sourdough microflora is actually from the flour. Yeast and bacteria live on the outside of the grain (just like the yeast to make wine lives on the skin of the grapes). Whole-grain rye flour is so great for sourdough because it has a high level of enzymes that attract a variety of yeasts. I have built & maintained sourdough starters with & without rye flour and there is no contest, rye flour is by far, the best performing flour for building and maintaining your sourdough starter.
If you are unable to procure whole grain rye flour there are other whole grain flours that are good stand-ins, like whole wheat flour or whole spelt flour for example. If worse comes to worst, you can start a sourdough starter with unbleached bread flour or unbleached all-purpose flour, typically it will just take a bit longer to get active.
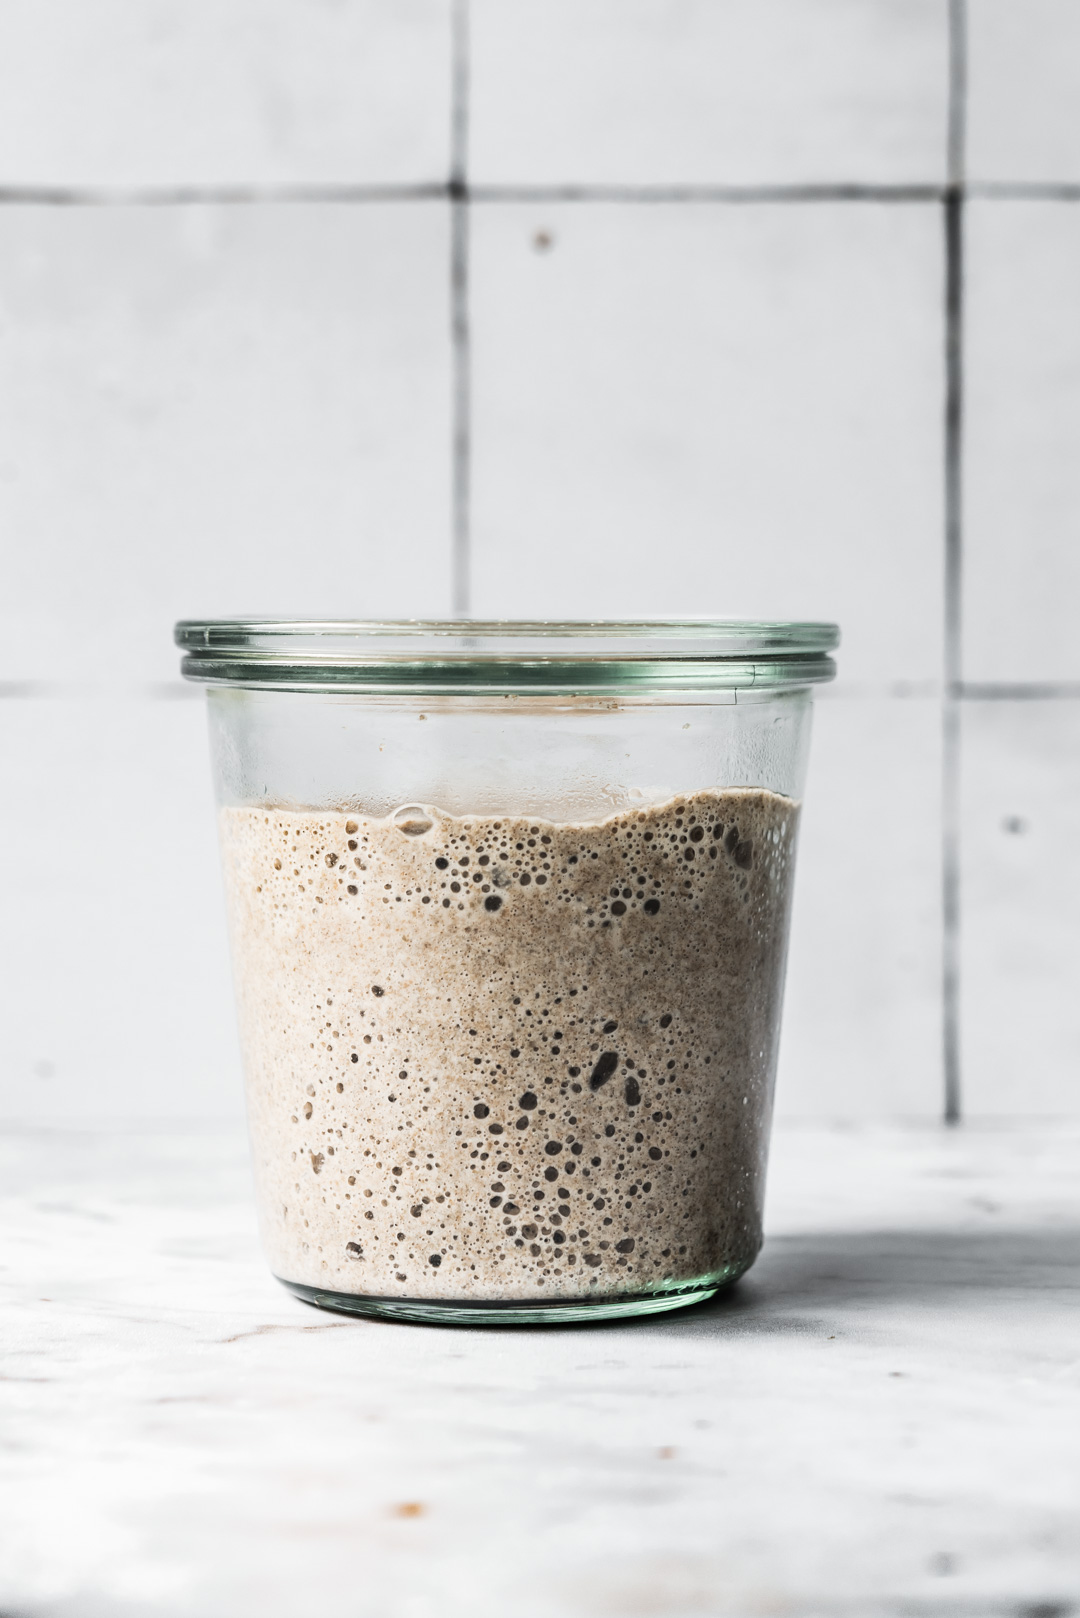
FLOUR + WATER + TIME = BASIC SOURDOUGH STARTER
I have followed this basic sourdough starter guide to build several starters over the last couple of years and it has never failed me (my guide is based off of my friend Joshua Weissman’s starter guide). Generally speaking, if you follow this guide, you will have a viable sourdough starter in just 7 days!
FLOUR SELECTION:
- WHOLE GRAIN FLOUR: When it comes to building a sourdough starter the fresher your whole grain flour is the better. If you can procure fresh-milled flour, the difference you will see in your starter & in your baked goods is incredible! Two fresh-milled flour sources available in the US that I have used are Flourist & Central Milling.
- UNBLEACHED ALL-PURPOSE or BREAD FLOUR: My preferred store-bought flour in the US is King Arthur Flour. Whether you use all-purpose or bread flour, both will work equally well in building and maintaining your sourdough starter.
WATER MATTERS:
Make sure to only use filtered water for your sourdough starter & loaves. Your sourdough starter and the naturally leavened loaves you make with it contain wild yeast and lactobacillus bacteria which work much more slowly than commercial yeast. Any chemical compounds that are present in tap water can produce undesirable reactions in your starter & dough, so using only filtered water is the best for sourdough.
The one ingredient that I did not list in the above headline is TEMPERATURE. The ambient, warm environment that you ferment your sourdough starter in MATTERS! There are several ways to create a warm environment for your starter (78° – 82°F is ideal).
- OVEN LIGHT: This is my preferred method for creating a warm environment for my sourdough starter and general proofing. An empty oven with the light left on typically warms up your oven just enough to make it ideal for your starter and proofing dough in general.
- BROD & TAYLOR PROOFER & SLOW COOKER: This is the ultimate proofer that also slow cooks and is perfect for fermenting. While I do not have one, it is a popular choice for the baker who wants exact temperature control for their starter and bread proofing.
- HEATING PAD: A heating pad set on the lowest setting can be a great tool for warming up the immediate area around your sourdough starter.
In addition, you want your water to be warm (85°F) for building your starter as this will help contribute to the ambient temperature of your starter.
HERE’S WHAT YOU’LL NEED:
- GLASS JAR: For building your starter, you are going to need a glass jar that holds at least 18oz. I use a Weck 742 half-liter jar that holds 19.6 ounces and it is perfect! It has a nice wide girth that makes mixing your starter a breeze! Also, make sure your jar has a lid that can fit loosely without falling off, another reason why I love Weck Jars, their glass lids are perfect for building and storing a sourdough starter.
- KITCHEN SCALE: the only way to ensure consistent results in any baking is with a kitchen scale, which is why all ingredients you will find here are listed in grams.
- RYE FLOUR & ALL-PURPOSE FLOUR: You can find rye flour from Bob’s Red Mill in grocery stores and online from Flourist or Central Milling. For all-purpose flour, I typically use King Arthur flour, which is made of hard red wheat and has an 11.7% protein content. Bread flour can be substituted for all-purpose with no issue.
- FILTERED WATER: We have a reverse osmosis system in our house, but a simple Brita filter will take care of chlorine and other nasties you don’t want to add to your sourdough starter.
- THERMOMETER: One of the most critical parts of the sourdough success is temperature regulation. An instant-read thermometer makes quick work of checking temps throughout the sourdough process.
- SILICONE SPATULA: From mixing your starter to keeping your jar nice & clean, a good silicone spatula is an indispensable tool for building your sourdough starter.
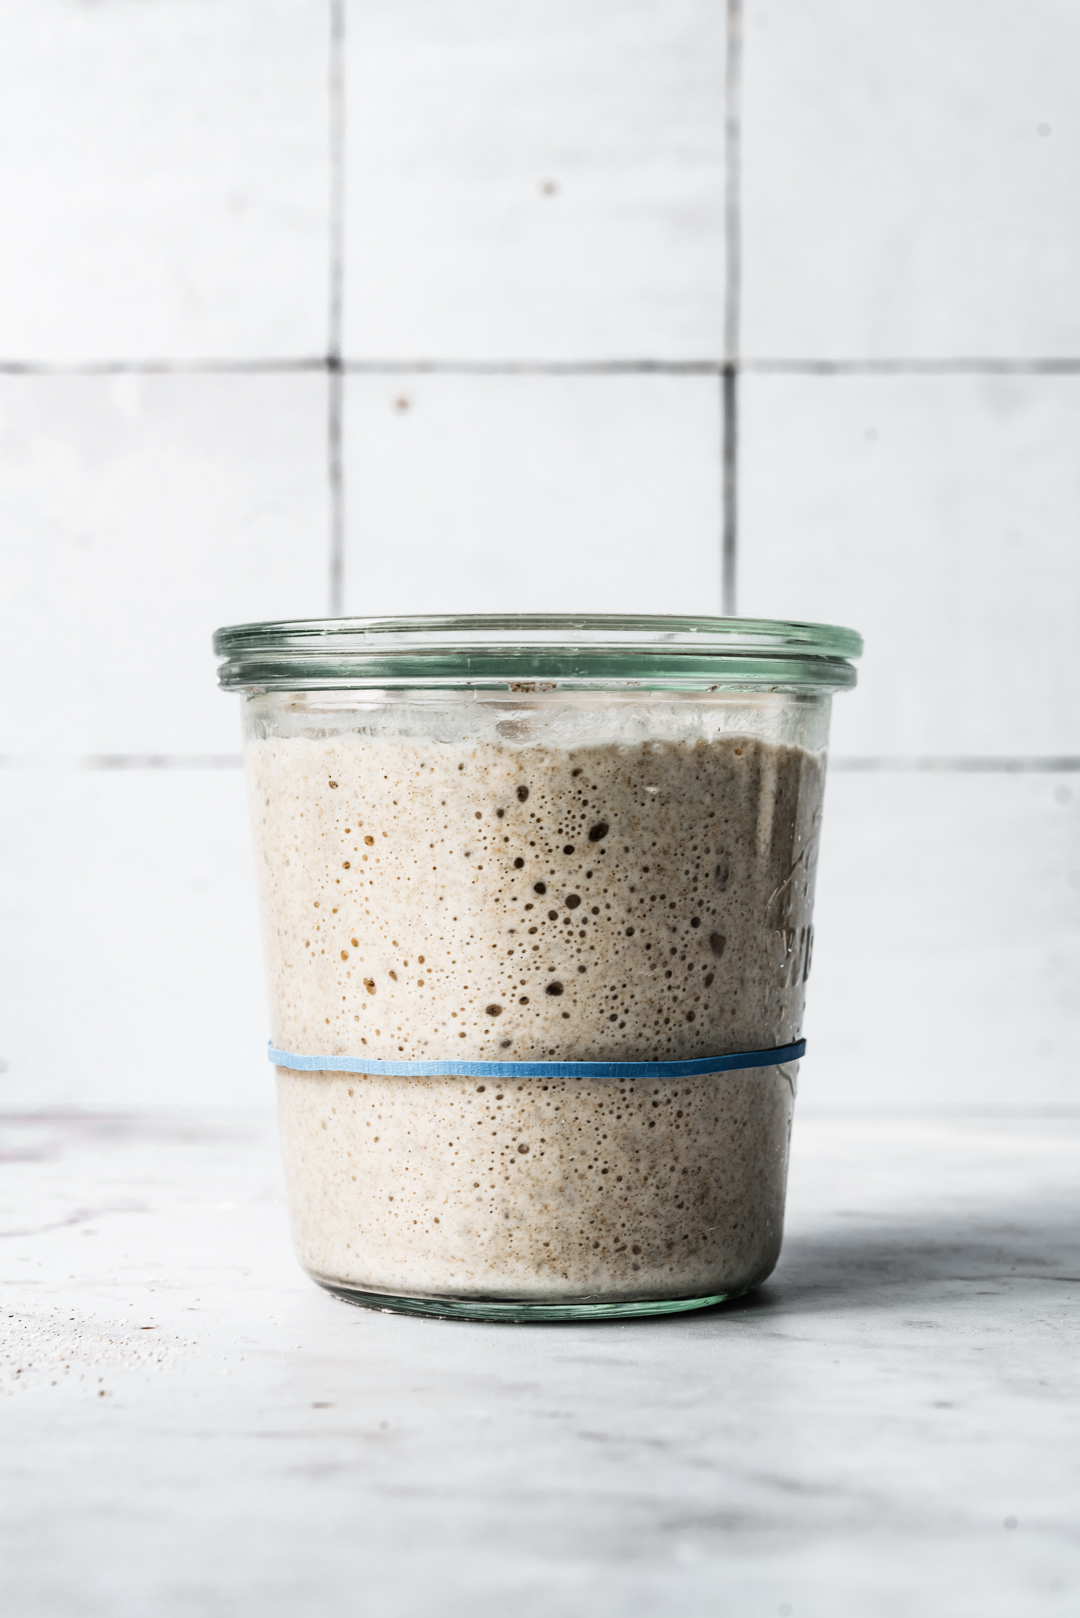
- RUBBERBAND: If you would like to gauge how much your starter is growing, wrap a rubber band around your jar at the height of your starter after feeding.
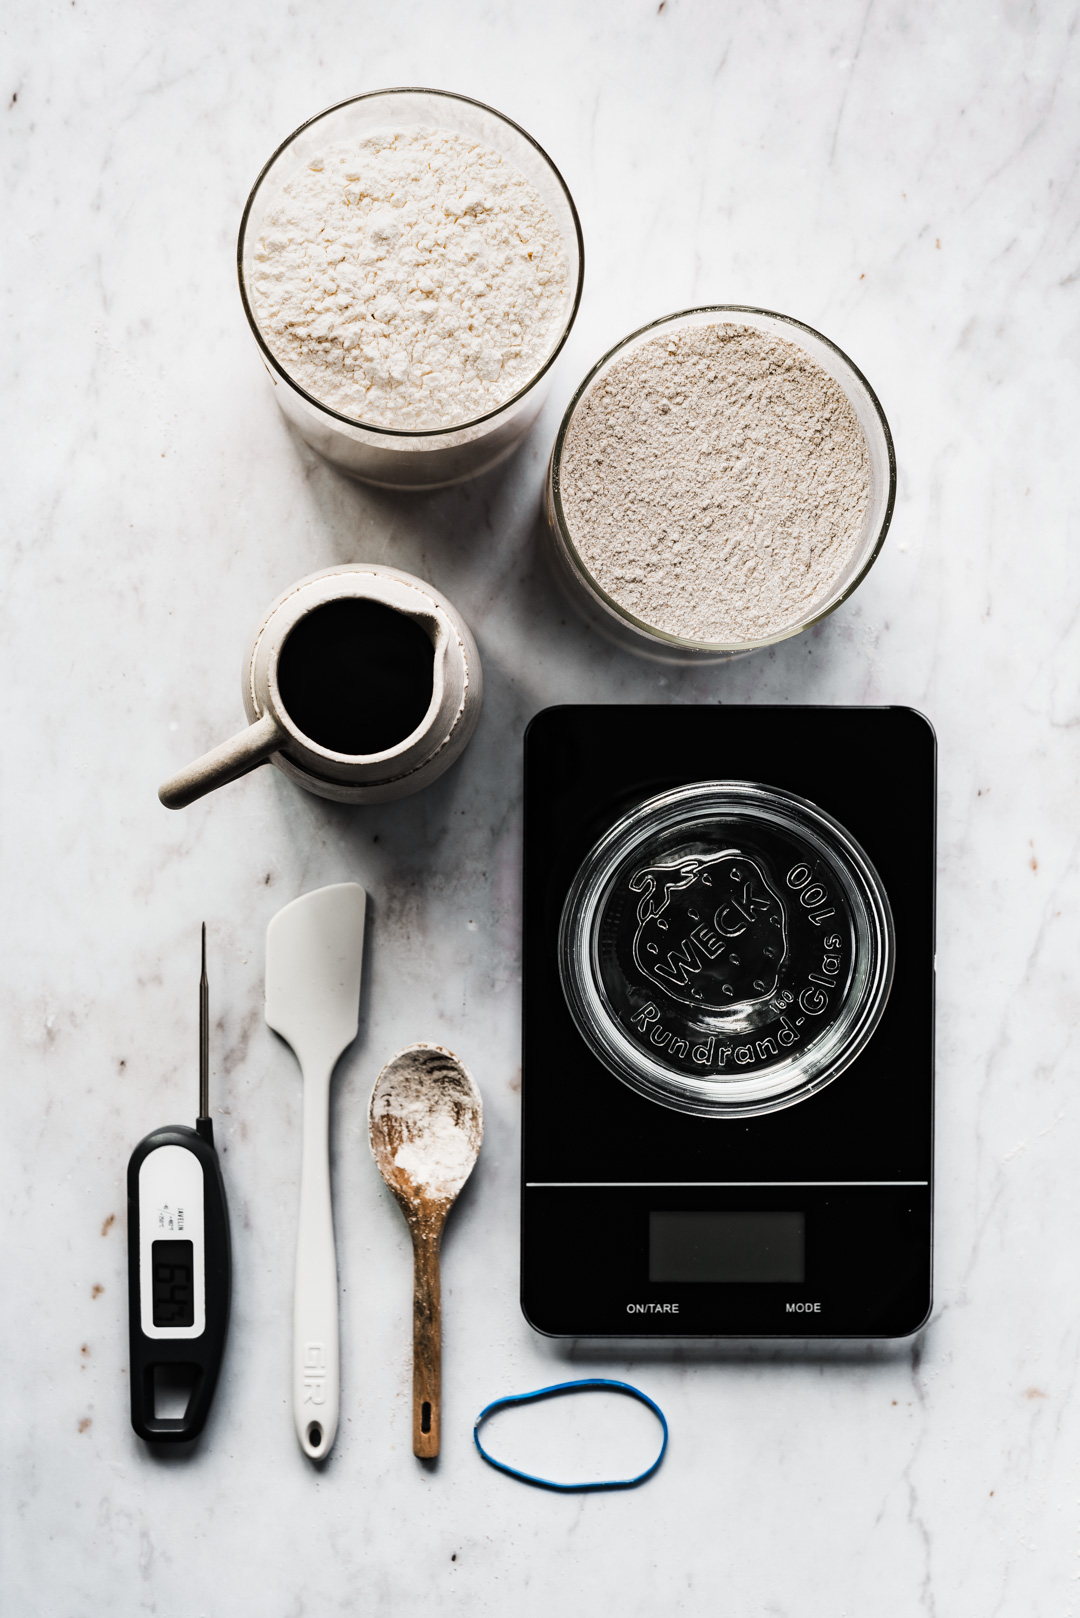
BASIC SOURDOUGH STARTER FEEDING PROCESS:
I recommend beginning DAY 1 of the sourdough starter process in the evening (ideally by 10pm). This basic sourdough starter guide follows a 24-hour cycle between feedings. When you feed your sourdough starter each night, you will be preparing it to eventually be ready to make bread with it on the morning of the 8th day.
DAY 1: Starting with 100% rye flour is the best way to introduce lots of wild yeast into your starter! You should notice a fair amount of bubbles in your starter after it’s 24-hour rest.
DAY 2: For this feeding, we are going to introduce a little bit of all-purpose flour and we will use less water because we reserve 70g of our day-old starter.
DAY 3: Today’s feeding is the same as DAY 2, you may start noticing bubbles on top of your starter as well as a nice sourdough smell.
DAY 4: We are going to reduce the amount of rye flour once again, and will feed 50g rye & 50g all-purpose flours. Your starter may look like it is not growing much, but stick with the schedule and by tomorrow it should double in size at its peak activity.
DAY 5: Today we repeat the same schedule as DAY 4. Your starter should be showing more signs of activity and should have doubled (or grown even more than doubled) at its peak activity.
DAY 6: This is the first time we will step down from 70g of mature starter down to 50g of mature starter. Your starter should be just as active as it was with 70g of starter at its peak activity, this is a sign that our starter is almost done!
DAY 7: Now we step down from 50g of mature starter down to only 25g. After this feeding, your starter should have almost tripled in size overnight and it will be ready to bake your first loaves of bread!
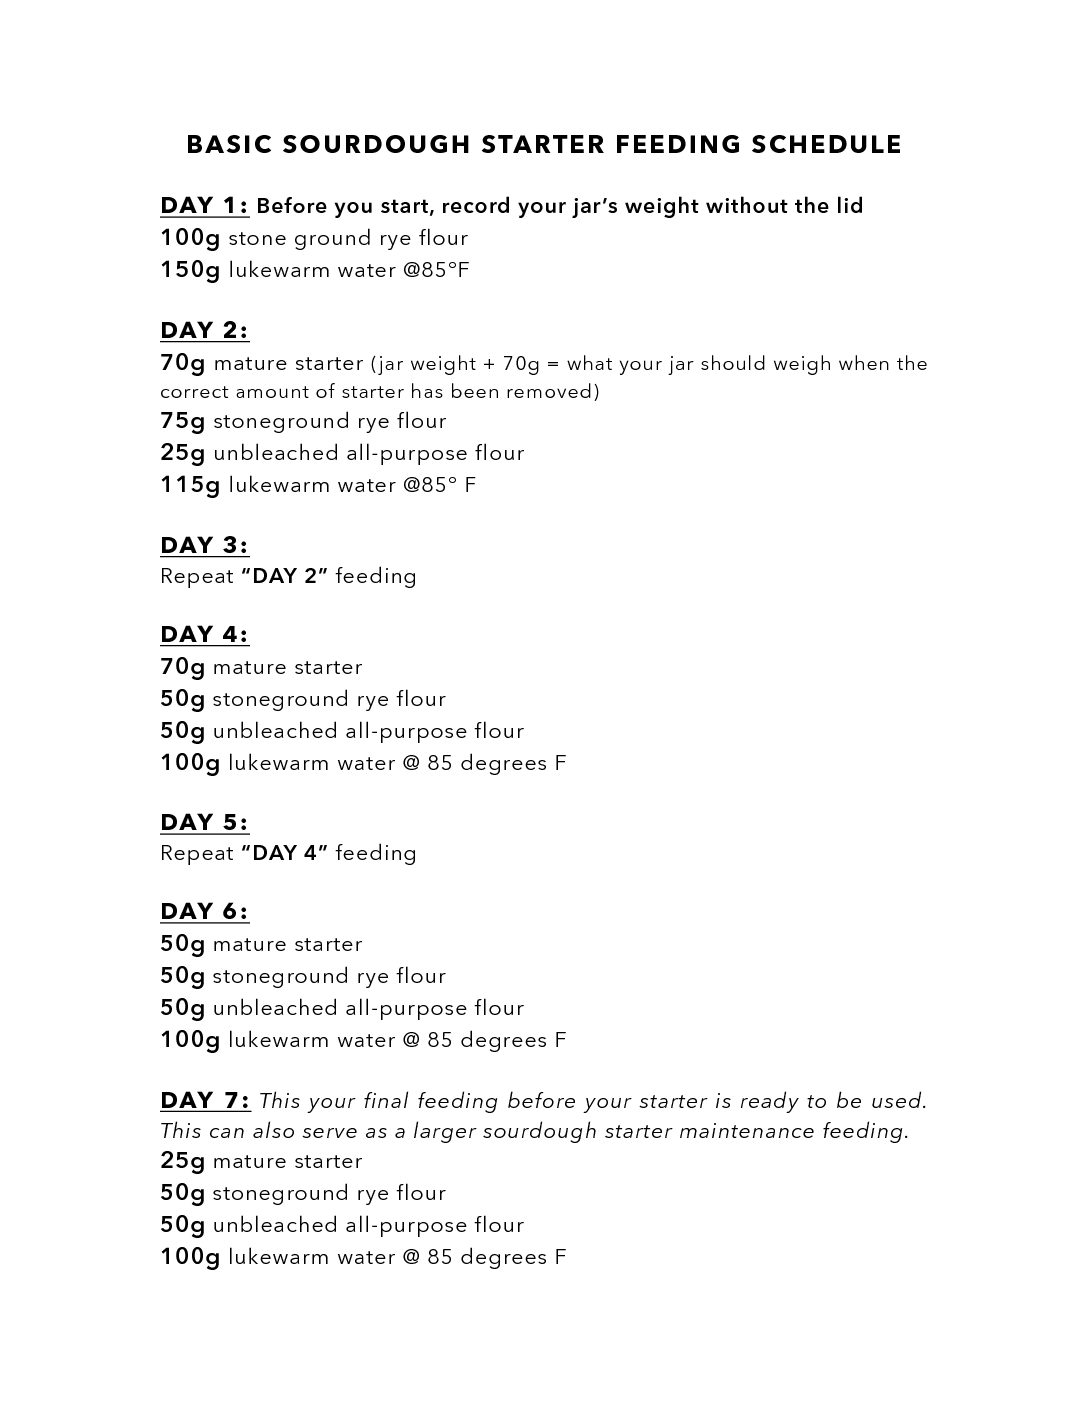
BASIC SOURDOUGH STARTER FEEDING SCHEDULE PDF:
For your convenience, I created this handy downloadable PDF schedule :)
FREQUENTLY ASKED SOURDOUGH STARTER QUESTIONS:
You may have questions along the journey of building your sourdough starter and you are not alone! I teamed up with William’s Sonoma to compile a list of the most frequently asked sourdough starter questions and have answered all of them over on their blog! CLICK HERE to read the SOURDOUGH STARTER FAQ’s
YOUR SOURDOUGH STARTER IS READY, WHAT NOW?
You’re ready to make bread and start maintaining your starter! For your first sourdough bread making endeavor, I recommend starting with my BASIC SOURDOUGH BREAD GUIDE! In my comprehensive sourdough bread guide, I teach you all of the necessary techniques (yes, there are videos!) that will empower you to make your sourdough bread dreams come true!
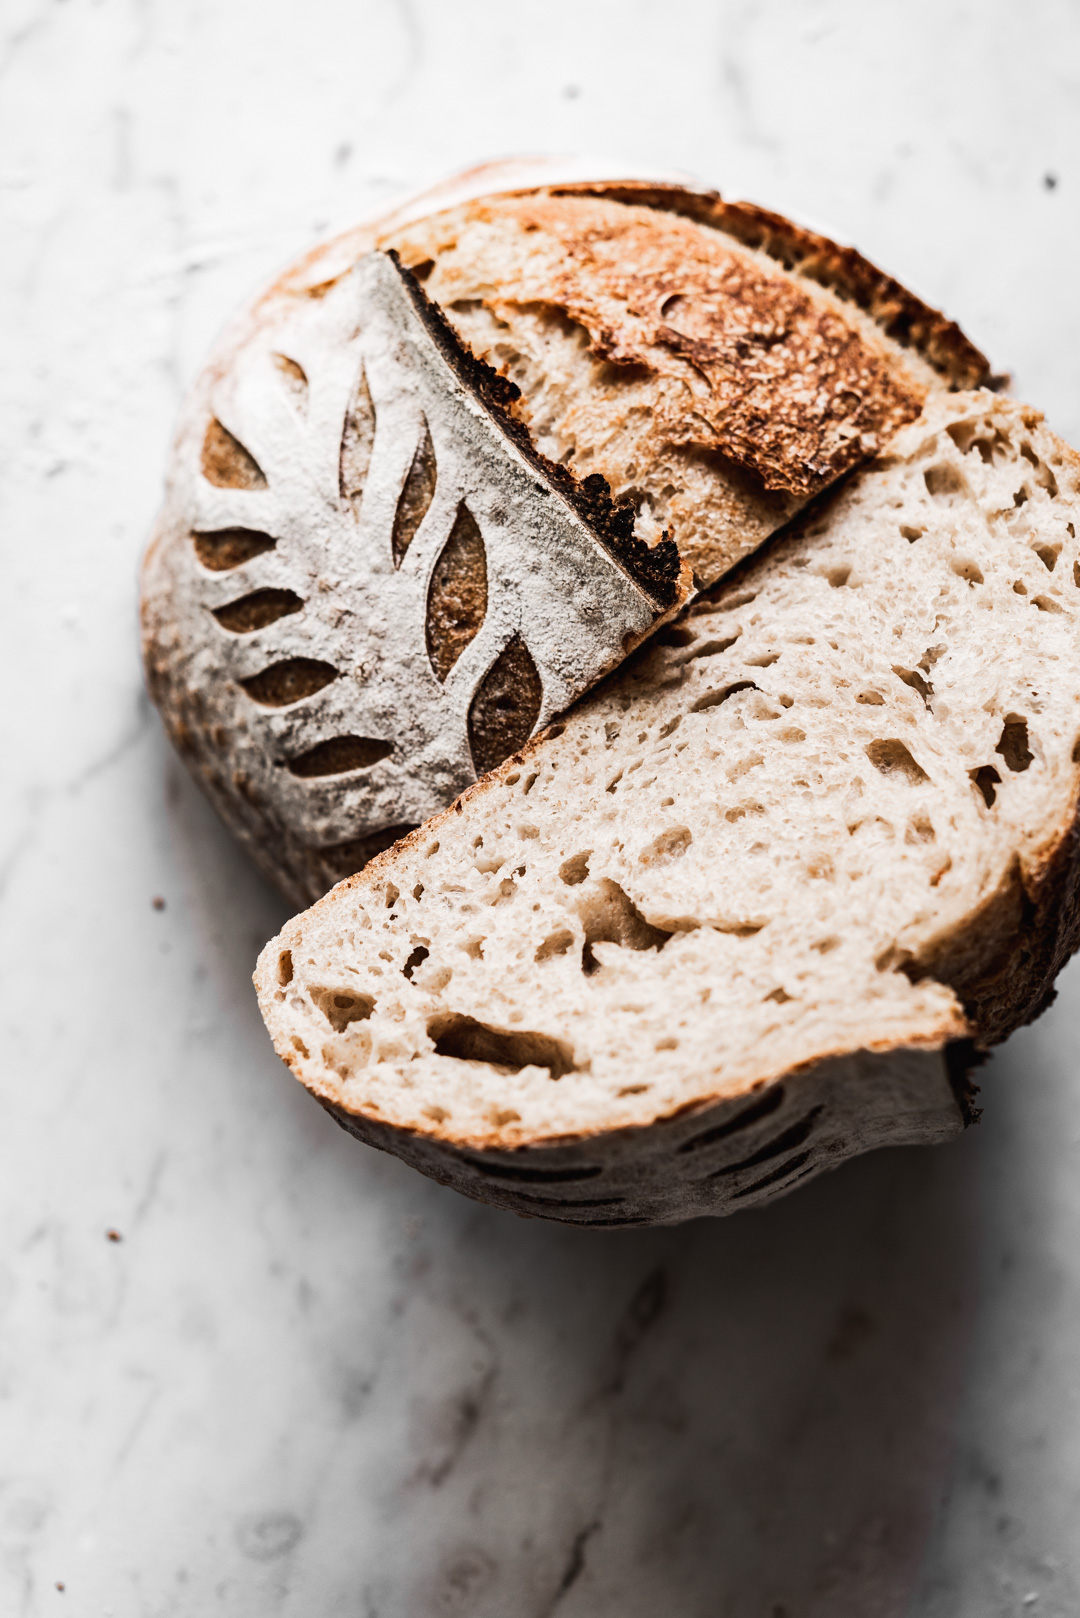
BASIC SOURDOUGH STARTER MAINTENANCE
Once your sourdough starter is nice and active, there is no need to continue daily feedings. Instead, you will store your starter in the refrigerator once it has reached peak activity. Keeping your sourdough starter in the refrigerator retards the fermentation process. When your sourdough starter is newer, I recommend pulling it from the refrigerator once a week to refresh it, typically you would do this the night before you are ready to make your sourdough baked goods.
This is the feeding ratio that I use to maintain a smaller amount of starter which eliminates discard/waste:
25g mature starter
25g stoneground rye flour
25g unbleached all-purpose flour
50g warm filtered water (85°F)
I typically feed my sourdough starter every 7-10 days but have left my starter in the refrigerator for several weeks without feeding and my starter bounced right back when I finally fed it!
LAST BUT NOT LEAST
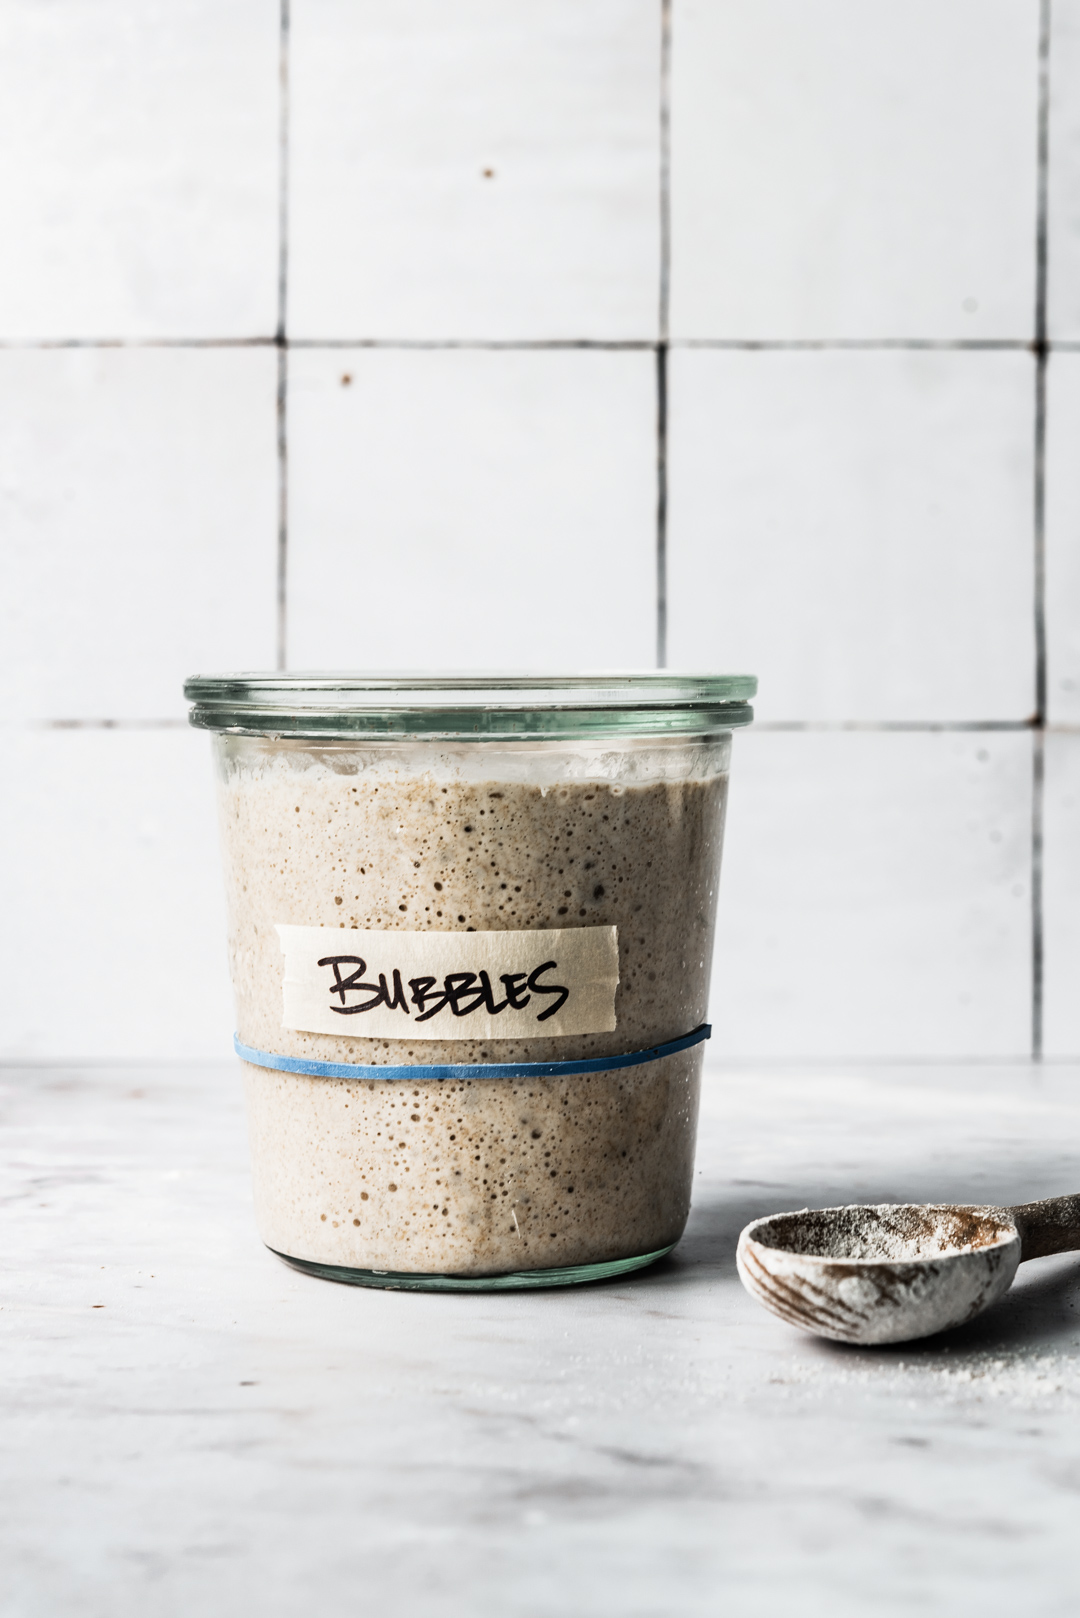
One commonly overlooked element in building a sourdough starter is choosing a name for your sourdough starter! Now you may be thinking to yourself: how could this possibly matter? But let me tell you, naming your sourdough starter is not only fun (there are a lot of clever sourdough names out there!) but it gives you a personal connection and intimacy with your starter that makes the whole process much more enjoyable, and in my opinion, more successful. Some people have even been known to play music for their starters!
As always, I am here for you if you have any questions throughout the process of building your sourdough starter! If you use my basic sourdough starter guide, please let me know by rating the recipe and leaving a comment! I wish you the very best on your sourdough journey <3

BASIC SOURDOUGH STARTER GUIDE
- Total Time: 35 minutes
Ingredients
- Stoneground rye flour (you can substitute whole wheat, whole spelt, etc)
- Unbleached all-purpose flour (you can substitute with bread flour)
- Filtered water
Instructions
DAY 1: Before you start, record your jar’s weight without the lid
- Add 100g stone ground rye flour & 150g lukewarm water @85°F to your jar
- Mix until thoroughly combined. Cover jar with lid and leave in a warm place for 24 hours.
DAY 2:
- Reserve 70g of your starter (jar weight + 70g = what your jar should weigh when the correct amount of starter has been removed)
- Add 75g stoneground rye flour, 25g unbleached all-purpose flour & 115g lukewarm water @85° F to your jar.
- Mix until thoroughly combined. Cover jar with lid and leave in a warm place for 24 hours.
DAY 3:
- Repeat “DAY 2” feeding
DAY 4:
- Reserve 70g of your mature starter.
- Add 50g stoneground rye flour, 50g unbleached all-purpose flour & 100g lukewarm water @ 85 degrees F to your jar.
- Mix until thoroughly combined. Cover jar with lid and leave in a warm place for 24 hours.
DAY 5:
- Repeat “DAY 4” feeding
DAY 6:
- Reserve 50g of your mature starter.
- Add 50g stoneground rye flour, 50g unbleached all-purpose flour & 100g lukewarm water @ 85 degrees F to your jar.
- Mix until thoroughly combined. Cover jar with lid and leave in a warm place for 24 hours.
DAY 7: This your final feeding before your starter is ready to be used. This can also serve as a larger sourdough starter maintenance feeding.
- Reserve 25g of your mature starter.
- Add 50g stoneground rye flour, 50g unbleached all-purpose flour & 100g lukewarm water @ 85 degrees F to your jar.
- Mix until thoroughly combined. Cover jar with lid and leave in a warm place for 8-10 hours.
DAY 8:
- Your starter should have tripled in size in 8-10 hours overnight. It is now ready to use!
- In between bakes, you will store your starter in the refrigerator. Pulling it out the night before you plan on preparing a recipe to refresh your starter before using it again.
- Prep Time: 35 minutes
- Cook Time: 0 hours
- Category: Bread
- Cuisine: Baking





WOW, what a guide!!!
Thank you SO much!
This is hands down the most detailed, organized, and comprehensive sourdough guide I’ve ever come across on the internet, thanks much for all the hard work you put into this post!!
That means so much to me! Thank you! And you are very welcome!
Your guide came in just in time. I’m doing a light version of a sourdough starter (3 days) but will be tackling the proper version using your brilliantly layed out and detailed guide.
Thank you so much 🙂
YAY! That makes me so happy! I have been wanting to write up a sourdough starter guide for some time now and I am so grateful that I did! You are so welcome, I cannot wait for you to try it!
Wow! After perusing a ton of articles, video’s, recipes, I discovered Bella and her Guide! What a game changer for me! Also, she is prompt with responding to any questions or concerns. I am now giving friends My starter AND her sourdough Guide! No reason now to feel intimidated by the process. Thank you Bella for such a great gift of your written guide AND the accompanying video’s in step-by-step format!
I am so grateful for your support Lynn and I couldn’t be happier that my guides have been a gift to you! I love that you are gifting your starter to friends, what a beautiful gesture in these difficult times <3
This came just at the right time, and it is going to come in SO handy! Thanks Bella for this beautiful and comprehensive guide 🥳
YAY! I am SO happy for that! You are so welcome Pia!
Williams Sonoma is SSOOO fortunate they partnered with you on this for a myriad of reasons Bella, this post and guide is a World-Class Gamechanger!!!!!!!!!
Thank you! It was a huge honor to partner with them! I am looking forward to getting their post finished and linked to mine!
Bella I full-filled
Very organized, specific, detailed way on making a sour dough bread which happen
to be my all time favorite. Thank you for sharing this to us.
Therese
Oh yay! Thank you so much Therese! You are very welcome!
Yay!!! What an amazing job Bella! :) You are now the whole bread making package, lady. Way to go. Thanks to you, the masses are enjoying the best bread ever. I can’t say the name Bubbles without smiling!!!! <3
Thank you SO much Ash! Haha, you are so right! And yes, Bubbles just makes you smile! Love you!
Such an invaluable sourdough making tutorial for all bread lovers out there!
Thank you dear Bella!!!
Thank you Marilena! I appreciate it! <3
Best sourdough starter guide ever! Thanks Bella, you’ve been such a big part of my sourdough adventures. You are so helpful, and make it so easy!
Oh wow! Thank you so much Josephine! That means a lot to me! I am so glad that you have found my guide so helpful <3
Someone just gave me a sourdough starter (from a 10 year old starter) and i was trying to figure it out. Great timing!!!
Oh yay! How exciting! So happy my guide came at the perfect time for you!
Hi I couldn’t find the flour anywhere so I used whole wheat. Is this ok? Also I started the starter last night, and looking at it now there is a dark liquid in the top. It isn’t very bubbly and doesn’t appear
to have grown. What should i do? Any info would be helpful. Thank you
Hello Lauren! Using whole wheat is just fine! Liquid can collect on the top of your starter when it hasn’t been fed in a while. This liquid is the alcohol given off as wild yeast ferments. The presence of this liquid (also known as ‘hooch’) isn’t a sign that your starter is in danger. However, it does indicate that your starter is hungry and needs to be fed! So just keep pushing forward and you starter will begin to look more bubbly and active each day! Also, may I ask, what is the ambient temperature where you are leaving your starter to ferment?
I have it covered in the oven at 80degrees. That’s the temp when the lights are on and the door is closed. Should I feel it now? Or wait until the 24 hour mark tonight?
Hi Lauren, I had the same thing happen to me with this recipe! I was wondering if it was because there was a higher ratio of water to flour in this one. I also think I put the starter in too warm of a setting. This is only my first night, but might start over. Let me know if your bread turned out good even with the separation!
Hey Krista! As long as the temperature did not exceed 90 degrees, you should be just fine. But ideally, you will keep the environment around 76-80 degrees! Wishing you the best on your sourdough journey!
Hi there. I know this is a week or two later but I thought it might help any other newbies who look at their day 2 starter and wonder if they are doing something wrong! I am on day 4 of making my starter and going from day 1-day 2 my starter didnt really do very much – it looked quite heavy and dark with only maybe 1 or 2 bubbles but by the end of day 3 it looked very light and bubbly and this morning (day 4) looking at my starter it has doubled in size and is paler again. I have been making sourdough bread for some time I have never had the nerve to make a starter from scratch – your website is so clear it has made the process very easy and unstressed! Thank you!
Hi Gilly! Thank you so much for chiming in with your sourdough starter building experience! I am so happy that my guide made the process easy for you! Happy baking!
Bella! This is amazing!! Everything I’ve been hoping for in a sourdough starter!!!! Phenomenal!!!! Thank you!!!
Thank you so much Michelle! <3
Can wheat flour be substituted for the all purpose white flour?
Yes! If all you have is whole wheat, you can most definitely just build your sourdough starter with that!
I’m using buckwheat flour for the starter, but can I use wheat for the daily “feed”?
I just followed all of your directions, but I had to substitute King Arthur AP flour for the bread flour, because I can’t find any right now. When I put the dough into the fridge, it looks almost exactly like yours, maybe a bit wetter, but not that much. The dough has been in the fridge now for 13.5 hours and it hasn’t risen at all. In fact, it looks like it’s deflated. I’m not sure whether to take it out or leave it there longer. Do you have any idea what went wrong?
Thanks!!
I would not worry too much about the dough not rising in the refrigerator…mine never really rises during the cold retard phase. When you gently press on the dough it should slowly retract back. This means you are good to bake straight from the fridge to the dutch oven!
Ok-I followed instructions to T except that I used whole wheat instead of rye because it wasn’t available. Made the recipe for bread your article links to. It was wonderful! So now my questions are regarding maintaining starter. I had my starter in the fridge and now have had to give it its first feeding since being refrigerated. Now what? Do I leave it out? Do I immediately refrigerate it? If I leave it out when do I put it back in the fridge? Another question is in regard to the discard-I’ve seen recipes you can use discard for-how is discard different than starter that can be used in a recipe for bread? And last-I’ve been removing most of the starter to a clean bowl, cleaning out my jars then putting 25g back in from the clean bowl-is this the best method or should I just keep the crusty jars as is and leave 25g in instead? Thank you so much for your help! I know this is a lot-I’m new to starter and so far all the work has paid off and your instructions have been perfect!
Hi Kristen! No worries, I am here to help! So happy you enjoyed my sourdough bread recipe! Now, let’s answer your questions!
1) I recommend pulling your starter out of the fridge to feed it the night before you plan on starting your sourdough baked goods. When you feed it before bed and leave it in a warm environment, it should be at peak activity when you wake up. Which means it will be ready to make baked goods with!
2) In my basic sourgough starter guide, I lay out the maintenance amounts of starter to flour to water that I recommend maintaining: 25g starter kept in the fridge and then refreshed with 50g flour & 50g warm water the night before baking. This yields you 100g of usable starter (and 25g to store in the fridge). From this 100g of starter you can make 2 loaves of bread (my bread recipe calls for 50g of starter) and pizza dough for example (my favorite pizza dough recipe calls for 50g of starter). So in this example, you can see that I was essentially left with no discard whatsoever and rather, just the 25g that I keep in the refrigerator in between bakes!
3) Finally, as far as the jar goes, you can really do it any way that you prefer. I personally try to wipe my jar super clean with my spatula after I feed it and use it. But, every once in awhile I do use a new jar if my old one seems like it is getting too crusty!
When I store my starter in the frig, should I store the whole starter, or should I discard some?
Thankyou,
Teri
Hello Teri! I personally store my starter in the refrigerator after I bake with it, so I only end up storing 25g. So, I would recommend you do the same so that you do not have a bunch of starter left over to discard!
Awesome starter guide! Thank you so much!! Question for ya: I’m on day 5 of my starter, and it says the starter should almost double in height; unfortunately, it’s only risen a bit and I’m almost at feeding time again.
As I try to troubleshoot what happened, I realized our kitchen temp is 70 F, and the guide recommends 80 F. Also, I did switch from feeding I bleached bread flour to unbleached all purpose flour yesterday.
Is the starter still salvageable? Do you happen to know where I want wrong? Also, do I keep following the guide onto day 6?
Thank you!
Hi Aisha! I would keep moving forward with what you have because it does sound like you have a bit of activity, but you will want to feed your starter only unbleached flour from now on! I would not reduce the starter down at this point because you have not achieved enough activity quite yet. May I ask you, are you only using all-purpose flour? Or do you have any whole grain flour? And getting your starter into a warmer environment is really going to make a huge difference!
Sorry for the typos in my previous message! I meant to say I had switched between unbleached bread flour to unbleached all purpose just for one feeding. I have also been using the Rye flour per your starter guide! Actually I just placed the starter under the oven light, and it’s already grown a lot more in a few hours. Thank you for the advice— I will go ahead and copy day 4 again and keep the starter at 70g. Thank you for helping the newbies like me :)
Hi. Me again and sorry if you’ve answered this but when building the starter do you feed same time every day (ie every 24 hours)? Or does it depend kind of? I know temp plays a part but yesterday my starter rose quickly and fell a long time before I fed it last night. It’s still fine but didn’t rise and fall over night again so quickly 🤷♀️
No worries Kristin! I typically feed my starter at the same time every day during the building process, but some people have found the need to feed their starter sooner to really get it going! Which is what you may want to do at this point. Please let me know how things move forward from here with that extra feeding!
Hi there, can I Halve the sourdough starter recipe so that I do not end up discarding so much starter?
Hi Claudia! You can definitely try that, although I have not tried that yet!
Hi Bella!
Just getting started with sourdough. I’ve had a few problems with my starter. It’s been dying consistently on Day 3, 3 times now. It turns a light orange color and ceases to rise or produce ANY bubbles, accompanied by a “foul” odor. The starters looked great on Days 1 and 2- they were VERY active, doubling and nearly tripling in size even on Day 1. I actually had one to knock the lid off my Weck 3/4L jar. But, all of these attempts were quite obviously dead, consistently on Day 3. I’m using a dark rye flour (Bay State Wingold) and King Arthur AP. I started using tap water and then switched to distilled both at 85F, as I thought my tap water was killing it off. I started with the jar on the kitchen counter, but then switched to the oven with light on. I thought the countertop was too cold, and I thought the oven was too warm. The jar/starter was about 89-90F in the oven. I’m at a loss! Any advice?
Thanks,
Michael Wolfe, MD
@drwolfebakes
NYC
Hi Michael! First off, I think that using filtered water is the way to go regardless…but your oven with the light on is probably too warm if it is getting up to 90 degrees. I would recommend checking the light bulb wattage on your oven light bulb and to consider lowering the wattage so that the oven is a nice ambient 78-82 degrees (my oven light bulb is 40w for your reference.)
Now as far as your starter “dying” on day three. I would try pushing on to the next feeding and ignoring the weird behavior of day 3 so that you can see how the starter behaves after this stage. It is very common for this to happen and should not be considered the death of your starter. The initial burst of activity on days 1 & 2 is typically a different type of bacteria in your starter that will eventually be replaced by the kind of bacteria we are trying to foster in our starter (lactic acid bacteria). So I would encourage you to get your ambient temperature dialed in and just push on through with the feeding schedule!
Thanks, Bella! I read your reply last night just before I was about to discard another starter because I thought it was dead again on Day 3. After reading your comments, I said, “What the hell,” and I fed it accordingly to your guide for Day 4. I peeked at it this morning, and I still thought it was dead. But, at noon it had a few bubbles near the bottom, and now at 7pm it is alive and well bubbling near the top of the jar. I left it out on the kitchen counter and wrapped a tea towel around it last night. I guess it just needed a little TLC ! (BTW, my oven bulb is also 40W, but it is a VERY warm 40W bulb. LOL. ). Again, thanks for your help!
Hi Bella!
I’ve noticed that other guides recommend twice daily feedings starting on Day 3 or 4. Are twice daily feedings really necessary? What are your thoughts?
Thanks, again!
Michael Wolfe, MD
@drwolfebakes
NYC
Hi Michael! I have found that twice-daily feedings are really only necessary for people who are not using a whole grain flour. I have built several starters with this method I have laid out here and I have never needed to feed twice in one day. But I have found that twice-daily feedings are sometimes necessary for people only feeding with all-purpose or bread flour!
Thanks you so much for this incredible guide! This is also the first sourdough bread Recife that gave me good results!
Quick question: I took my starter out of the fridge last night and refreshed it to start a bread this morning. Before putting the starter back in the fridge for the week, should I feed him again or is it ok with the refresh I did last night?
Thanks!
MP
Hi Marie! So happy my guide gave you good results! Your starter should be just fine with the refresh you did last night, no need to feed before putting it back in the fridge!
Thanks for this detailed guide and the sourdough bread one as well! I’m finally brave enough to try sourdough for the first time thanks to you and your beautiful loaves on IG pushed me over the edge.
I’m documenting my journey here: https://www.reddit.com/r/Sourdough/comments/gtpoba/sourdough_newbie_journey_to_first_loaves_using/
YAY! So excited for you Jackie! And I am following along on your journey over on Reddit! <3
Clear and detailed instructions. Thank you. I’m getting the gist of it, having begun about the same time the pandemic exploded in N-A. I haven’t been as successful as I would have liked yet, but am getting better at it. I’m 82 but gungho about sourdough. That rimes ;-). I’ve been doing coils and even Rubaud slaps… and am still having trouble with the final shaping… Question. Yeah I’ve got a question about feeding the starter. When you say whole-grain, do you mean whole-wheat? Does that include Rye? Or do you mean whole-grain rye? I’ve really reduced the rye content in the feeder. Should I maintain a 50-50 (AP-Rye)? Thanks for your answer. Merci…
Thank you so much Jean! I admire your determination! When I say ‘whole grain’ I mean un-refined whole grain flours like whole wheat or rye flour. I personally maintain my starter with 50-50 AP-Rye, because I love how robust the rye makes my starter, but you don’t have to do 50-50, you can do whatever works best for you!
Thanks you so much for this incredible guide! This is also the first sourdough bread Recipe that gave me good results!
Quick question: I took my starter out of the fridge last night and refreshed it to start a bread this morning. Before putting the starter back in the fridge for the week, should I feed him again or is it ok with the refresh I did last night?
Thanks!
MP
i’m on day 7 and my starter has started to smell like acetone, what should i do?
I looked into this issue and here is what I found: “This a fairly common occurrence with wheat starters, especially in the summer: they start smelling of ‘pear drops’, i.e. a bit chemical. The smell is actually acetone. Under certain conditions, the lactic acid bacteria in the sourdough produce copious amounts of acetic acid which gives the familiar vinegar smell. Another couple of chemical steps and this can turn into acetone. It can be a bit alarming to sniff your sourdough and get the aroma of nail polish remover, but it is nothing to worry about. As soon as you dilute the sourdough by refreshing it with flour and water, the smell goes away.”
If you want to delay the onset of the acetone effect, you can stiffen up your starter by adding flour to the pot of it that you keep in the fridge. A stiffer sour will work more slowly, but, in the long run, will produce more acetic than lactic acid
I am looking at a sourdough potato and rosemary recipe that you start in the evening with half of the ingredients. Do you have any tips on when to pull out starter and feed before making? My first attempt didn’t go as planned.
I typically remove my starter from the refrigerator the night before I am going to prepare my dough. You typically need about 8 hours after feeding a starter that has been stored in the refrigerator.
Hi Bella.
I really enjoyed your step by step guide it is very detailed.
I have a question if I will be baking everyday with the sourdough starter how can I maintain it by leaving it outside at room temperature. Is it the same as the regular maintenance or something differently?
Hello Matthew! SO glad you have enjoyed my guide! If you are going to be baking every day, you may still want to keep it in the refrigerator between feedings to keep the acetic acid from getting too strong, especially now that temperatures are warmer. Otherwise, you may need to feed it twice a day to keep the starter happy sitting out at room temperature. If I was going to do what you are proposing, I would feed before bed so the starter was ready in the morning, remove the amount of starter you need for your recipe, put the remaining refreshed starter in the refrigerator and then feed again before bed, etc, etc. Does that make sense?
Day 7 and my sourdough (called Cappuccino ☕️ 🤪) is healthy and active! I can’t recommend this guide enough! Bella you’re just the best!
Oh yay! SO excited for you and Cappuccino! You are going to bake great things together!
Hi Bella! Thank you so much for this guide. I have successfully used it to bake sourdough loaves on two separate occasions and was blown away by how good it turned out. After my second baking, I mistakenly threw out my remaining started. I am now in the process of creating another starter. I am on Day 3 and my starter has not done much today. In addition, it has a terrible odor. On day 1 and 2, the starter was very active and almost tripled on day 2. What is the cause of the odor and is the starter still good or should I trash it and begin again?
Thanks!!
Hi Betsy! So sorry you had a mishap with your starter! But don’t fret, things tend to slow down on day 3 and 4, and as far as the weird smell goes, it should go away as you continue with the feeding schedule! Just keep on with the schedule and things should move along just fine! Let me know if you have any other questions!
Awesome guide! I followed your instructions exactly and got a great starter. What do I do if I want to increase the amount of starter in my mother starter from the 25 g starter/100 g water/50 g rye flour/50 g all purpose flour in a feeding?
Hello Sam! So grateful my guide worked out for you! Just want to clarify, are you asking if you can increase the amount of starter in the feeding schedule from 25g to say, 50g?
Thank you so much for your reply! I am sorry that my question was unclear. I am looking to increase the amount of mother starter in 1 feeding to double the amount that I would normally have after 1 feeding. I am looking to make a recipe that calls for a large amount of fed starter. How would I do this? Thanks again!
You would simply feed your starter the amount that you need to increase to. For example: if you have 25g of starter and need to end up with 200g of starter + enough leftover starter to keep in the fridge, simply feed 100g of flour & 100g of water! Hope this helps!
Thank you so much!
You’re so welcome ;)
Thank you, Bella! Your detailed guides and vids are perfect for a beginner like me, or for anyone looking to improve their timing and sourdough skills.
I have just one question that I can’t seem to find the answer to anywhere. At what point after feeding your starter do you put it in the fridge for storing? Before it rises, after it rises, somewhere in between? Thank you!
Hello Suzanne! So happy you have enjoyed my guides! I store my starter in the refrigerator after it has reached peak maturity (this is in the morning for me, after a before bed feeding). Happy baking!
Hello Bella, I am into 7day starter using rye wholewheat flour and plain flour. The volume increases each time and I can see activity on the surface but it failed the ‘floating’ test. Where do I go from here? Thank you
Hello Celia! You may need to feed for another day or two…you will know your starter is ready when it increases by two-three times its size in about 8 hours…
Let me know how it goes and if you have any other questions
Thank you Bella, I shall persevere and let you know soon. Love your site
Hello Bella, Good news! I did as you suggested, the starter did double in size and a positive floating test. I have put the entire jar ( about 225g of starter) in the fridge. I am not baking till the weekend. Am I right to say – the night before I take 25g starter and feed 25g rye , 25 plain and 50 water and discard the the rest of the starter in the jar? This will be my first attempt baking sourdough and I am both nervous and excited, more the former! Fingers cross. Thanks again
Hi Celia! Yay! SO happy that your starter is ready to go! Yes, you only need to refresh 25g of starter the night before you plan on preparing your bread dough. The rest of the starter, the ‘discard’ can be used in a recipe that calls for discard (pancakes are a favorite of ours)
I’m so excited to create a starter from scratch, but I haven’t been successful. The first 4 days there was lots of activity, but the starter hasn’t grown or shown any activity since then. I’m on day 7. I used whole wheat flour, unbleached AP flour and filtered water from the fridge warmed to 85. At night, it gets cold but the room the starter is in stays around 70. Start over or put it in the oven at night? Also, is it better to use a porous top like cheesecloth or the jar lid?
Hi Julie! I am sorry that you are having difficulty with your starter! I don’t think the porous lid will make a difference, leaving a normal lid slightly ajar/loosely sealed should be fine. Your nighttime temperature is a bit cool, so that is most likely your culprit. Have you tried monitoring the temperature in your oven with the light on? That may be your best bet to keep things consistent. But you want to see what temperature your oven gets to with the light on. A 40watt light bulb will keep my oven right around 78 degrees, which is perfect. But if your oven light bulb is higher than 40watts you could have the opposite problem which would be too warm of an environment. Temperature is one of the most important ingredients with sourdough. Another option would be keeping it on a heating pad set to low (there is actually one specifically for bread). Let me know how things progress from here and if you need any more help!
I am in the maintenance phase with my sourdough starter and plan to feed once a week. This week I do not plan to do any baking but must still feed the starter. Do I do a normal feeding at night and put back into the refrigerator, or do I leave on counter until next morning. Do I discard again keeping only 25g or just leave the full amount in the refrigerator until the next feeding and discard then?
Hello there! Yes, you will want to feed your starter just as you normally do & leave it out overnight, per usual. As far as when to discard the excess, it all depends on if you plan on using the discard or not. Our favorite way to use discard is in sourdough pancakes! You can discard before putting it in the refrigerator, before your next feeding, or somewhere in between, it’s completely up to what works best for you!
Thank you for this lovely guide! We had a hiccup in the beginning but we got back on track and she’s going strong! I named her Ryeticia Addams, in honor of the spooky season and one of my favorite characters. The first treat of our household will be a loaf of rye bread.
You are so welcome Regina! SO excited for you and your family to enjoy homemade sourdough!
Hi Bella! I was wondering how I should feed my starter if I need more than what the initial recipe produces. Example – I need almost 300 g of starter for a recipe, but I currently only have 200 g on hand. Instead of doing 25 g starter + 100 g flour + 100 g water, could I do 50 g starter + 200 g flour + 200 g water?
Hi Regina! Yes, exactly- you’ve got it! You just retain more starter and feed it more to increase its volume!
So do you always use 1/4 starter to what ever measurements you need for the recipe? Example 25-100-100? I never seem to have enough starter for my recipes or the recipe uses all my starter. I need the information about what to do after you have a great sourdough starter😂
Hello Deb! I totally get where you are coming from! Here’s the deal: you can maintain as much or as little amount of sourdough starter as you find necessary based on the recipes that you use. I typically maintain a very small amount of starter because I know that I can always bulk up if I will need more starter for a special recipe that I do not regularly bake. Ultimately, you want to be left with at least 25g of starter after any baking project. And to your specific question about measurements, yes, you can use that as a general guide for feeding and bulking up your starter! Let me know if you have any more questions! <3
hi,
I love to do your Japanese milk bread its soooo 👍
I saw a comment asking what it means the starter is ready and active, and your answer was it means the starter was fed 1:1:1.
After reading the sourdough guide i see you recommend for the regular feeding on the 8th day to feed 1:2:2 (25, 50,50,100). I think there’s some details I dont understand….can you please guide me what is the right way to feed the day before backing?
thank you so much,
Nava
Hi Nava!
I understand why you are a little confused…let me try to clarify:
A “100% hydration sourdough starter” means it is 1 part water and 1 part flour. In other words, for every gram of flour, there’s a corresponding gram of water, hence 100% of the flour is hydrated
My starter maintenance feeding (once your starter is fully mature) is technically 25g starter/50g water/50g flour (1/2 ap & 1/2 rye flour) which is a 1:2:2 ratio, but technically, I am feeding my starter a 100% hydration mixture of flour and water.
The reason I feed my specific starter recipe at this ratio is that I use 50% rye flour, which has lots of natural yeasts/enzymes which yields a rapid rising sourdough starter, hence, I use less starter to slow down the rate at which the starter grows.
In order to write this recipe to be as universal as possible, calling for 15g of ripe sourdough starter (that is roughly 100% hydration) is the simplest way to describe it. I hope that this helps! Let me know if you have any other questions!
Hi,
Yesterday was my day one. So today I take 70 g and add the ingredients of day 2. But what do I do with the rest? Store or in an other jar?
Thanks for your help.
Patrizia
Hello Patrizia! I believe that we already connected on Instagram, but just in case, you simply discard the rest of the flour and water mixture, because it is not useable at this stage! You could use it in pancake batter or something like that, but it’s a pretty small amount so it’s up to you if you try to repurpose it in something with leavening because it is not ready to add any rising power at this stage.
Hi,
I am on day 4 of the sourdough starter, and it did not rise yesterday and today. The first 2 days were great and it rose really well but after that it just refuses to move 😪 Should I continue or restart the whole process? Please help.
On days three and four you will definitely notice the activity slow down but this is totally normal! Just keep on pushing through and you will notice by day 5 & 6 things are starting to double and then almost triple!
Hello,
I followed your steps and my sourdough turned out great. I am not able to calculate 90% hydration with this process. Do you have have an exact measurements which can be shared? Thank you for great processing steps..
Hello Bhakti! Are you asking me to help you turn my sourdough bread recipe into a 90% hydration recipe?
First of all.. sorry about leaving feedback under wrong recipe. Basically I want to use up to 90 % hydration to get larger pockets in sourdough bread by following your recipe and process. do you have an exact measurement for that or should I just increase the water ration to increase the hydration?
Thank you for responding and awesome recipes. – Bhakti
No worries at all! If you want larger pockets I would recommend taking away some of the all-purpose flour and replacing with more bread flour (or using all bread flour). If you want more hydration you can simply just increase the water you add to the autolyse by about 207g. To do the math yourself, you simply add up the total amount of flour in the recipe (including in the starter) & multiply it by the percentage of hydration you want. Then you can work the math on how much water you need to add to the recipe to get to your desired percentage!
Hi Bella, thanks for such a wonderful starter guide!
I am on my day 3, I’m supposed to feed my starter tonight but I see that it has managed to grow out of the jar, is it possible that it is too active and how? I used the same measurements and the same weck jar you suggested.
I can tell it has deflated, should I feed it now or wait the 24 hours?
Hi Jolene! I am assuming you have carried on with the schedule by now, but to answer your questions: it is possible for the starter to overflow the jar on day 2 or 3 because of the naturally occurring yeasts and bacteria in the rye flour. Now, as you carry on with the starter building schedule, your starter will slow down and not grow as much, but this is just a sign that some of those yeasts & bacteria are dying off. As you approach day 5 & 6 you will notice the starter growing more once again, but it should not overflow the jar again!
As far as feeding before the 24 hours, you are welcome to (which will speed up the sourdough starter building process). But I like keeping things simple and just sticking to the evening feeding schedule :)
My first attempt at baking was with your Maple Chai rolls which are a regular favorite in this home. When I decided to try sourdough (without your guide), I ordered the started which promptly died. I found this guide in December and have had total success! Delicious bread (also with your tutorial-love the videos) and I have used all the discard for other wonderful things. Thank you Bella for opening this world to so many of us.
Reading your comment makes me SO happy! I am so so grateful that you discovered my guide and that it led you to sourdough success! Happy baking!
Hello! It’s my first time making a sourdough starter. I followed your guide, but my starter does not seem to be rising well even after more than 7 days of feeding. Although my starter never runs out of bubbles, it never reached a point when it doubled in size between one feeding and the next. For day 1 (February 20), I used King Arthur Light Rye flour. For the succeeding days, I used the same flour combined with unbleached all-purpose flour, following your instructions until day 7. But since I haven’t witnessed any signs of peak activity, I decided to keep feeding it like “DAY 6” feeding (i.e., 100g flour + 100g water). I, however, tried to switch up the flour ratios. Here’s how it went:
Day 8 (exactly the same as DAY 6 feeding)
50g light rye + 50g unbleached all-purpose
Day 9
100g light rye
Day 10
100g unbleached all-purpose
*noticed more activity, hence decided to use the same flour the next day
Day 11
100g unbleached all-purpose
Day 12
50g light rye + 50g unbleached all-purpose
Day 13 (today)
I decided to feed it 12 hours after my last feed.
50g light rye + 50g unbleached all-purpose
I hope I was able to give a clear picture of what I did. I really can’t figure out what I should do to help my starter reach its peak. What do you think went wrong and how should I go from here? Thank you so so much!
Hello Ela! I am sorry to hear that your starter is not growing as expected. Thank you for detailing everything you have done so far. My biggest question for you is how are you monitoring the temperature where you are growing your starter? Temperature is the most important element, even more so than which flour you are using. So please let me know your temperature monitoring situation and we will troubleshoot from there!
Hi, Bella! Thank you so so much for taking the time to respond. I live in Manila, Philippines. The weather has been erratic recently, ranging from 19˚C to 32˚C. The days were cooler when I started the starter until maybe day 4 or 5 if I remember correctly. I also tried to place the starter in our oven with the light on and different spots at home that are warmer, but I did not notice significant changes. Currently, my starter is in the refrigerator since PM feeding on Day 13. I hope it’s alright that I placed it there as I try to figure out what to do next. Thank you thank you!
Hello Ela! Temperature is very important, so keeping your starter in a stable, warm, ambient environment is critical. 25c or a touch warmer is ideal – please let me know where you are in the process and hopefully, we can get you baking your first loaf soon!
Hi, first of all, thank you for the thorough guide. Secondly, I’d like to better understand what you mean by “reserve” throughout the recipe. Do we take out 25 grams, for example, or do we leave in 25 grams? Thank you for your response I’m advance!
Hello Ekin! “reserve” simply means to keep the 25 grams in the jar. Remove all but 25 grams from the jar would be another way to describe it. Hope your starter is coming along nicely! Let me know if you have any other questions!
Hi Bella, I’m on day 11 now and I haven’t been able to get much activity since day 4. I use a fermentation station and have set my temp to 78. I just started feeding it twice a day (50g rye, 50g unbleached organic all purpose flour and 100 g water @ 85 degrees) starting on day 8 because I was getting the acetone smell. Now the smell is gone but I’m still not seeing much action going on. What am I doing wrong?
Hi Emily! I am so sorry that you have been struggling with getting your sourdough starter going. Is your rye flour fresh? Also, feeding twice a day when there is little to no activity could be the problem. You aren’t giving the cultures enough time to build up. And is the water you are using filtered? Let me know and I will be happy to help you troubleshoot this :)
Hi Bella, yes my rye flour is fresh. I noticed the acetone smell which I read indicates the starter is hungry and that was why I increase it to twice a day feeding. Should I ignore the acetone smell and go back to once a day feeding? Apparently the water I’ve been using from home is reverse osmosis water, so I switched to bottle water starting Thursday night. Not sure there’s been much difference since.
I would try ignoring the smell, I have built a good amount of starters with this guide and have never done more than once a day feeding. I use reverse osmosis water for my starter and bread baking without issue, but see what happens as you move forward from here! Please keep me posted :)
Hi Bella! Just wanted to know that my started did become very active so that I was able to bake my sourdough bread today :) the crust was beautiful and the sourdough did rise although it wasn’t as airy as I hoped it would be. It didn’t have a lot of big air pockets. What can I do to fix this the next time I bake sourghdough?
Oh yay! I was so happy to read your comment that your starter developed well! There are several factors that contribute to getting a nice & airy loaf. Did you monitor the temperature while you fermented your loaf? Ideally, the temp would be 78°F or warmer, if it was cooler at all, then fermentation will take longer than my guide lays out. Ultimately you’re looking for the dough to grow by about 50-70% in size from its initial size. Keep me posted!
Tks Bella! Good to know that reverse osmosis water will work just fine. I have gone back to once a day feeding since yesterday and I’ll be sure to let you know if it works. Tks again!
5 stars!!! Ah Bella, I’m feeding Freddy for the first time in a few months and it feels so comforting and happy to do so 😌 love referring back to this guide and your main sourdough guide. Hugs!!
YAY! This makes me so happy Ash! I am truly honored that my guide is what you turn to :) Love you!
Hi there,
I know it’s been a while since this was posted, but I want to say thanks. I do have a question as I didn’t see it being explained anywhere, how come the starter gets fed a bit of unbleached AP flour when it gets fed? Is it easier for the starter to ‘eat’?
Hello Robert. Sorry it took me a while to get back to you on this. The reason for the AP flour is not so much about it being easier for the sourdough starter to eat, it’s more about balancing the flavor, texture, and composition of the starter.
Hi Bella,
Hoping you can help! I have decided to try this sourdough starter, but think I may have started at the wrong time. It is early winter here in South Africa so the ambient temperature in my kitchen is around 10-17 degrees Celsius.
I have been keeping it in the oven and I am on day 6 today.
There are bubbles, and it smells fine, but it has not yet doubled in size. It only grows a small amount.
Another issue is that South Africa has Loadshedding which means we have multiple scheduled power cuts throughout the day, so there is no way of keeping it warm at certain parts of the day and night and hard to monitor and maintain a constant temperature.
I’m quite sure this is the reason it’s been slow.
I feel hopeful that it has bubbles, but not sure if I am wasting my time?
Should I just continue the feeding process a few more days after day 7?
How do I know when it’s time to give up?
Please help and thank you in advance!!
Hi Tammy! I think the best thing would be to leave your sourdough starter in the warmest place possible considering your circumstances. Only you will be able to determine where the warmest environment is. I wouldn’t worry too much about needing more than seven days to build the starter as sourdough is a natural process and not necessarily a precise science. I hope you have success with your starter! And feel free to ask me anything else if you need more help.
Im at day 7 of attempting to create a starter. Besides bubbles at the top, its not very active. Do I just continue feeding the feeding schedule laid out until its active and passes a float test? How long should I keep trying with this starter vs starting over?
Hey Molly – at this point I would be sure all of the environmental conditions are optimal: is your starter resting in a nice and warm area? Are you using filtered water?
Also, you could try adding more rye to the next stage to introduce some more cultures. Let me know how things go from here. I am happy to help :)